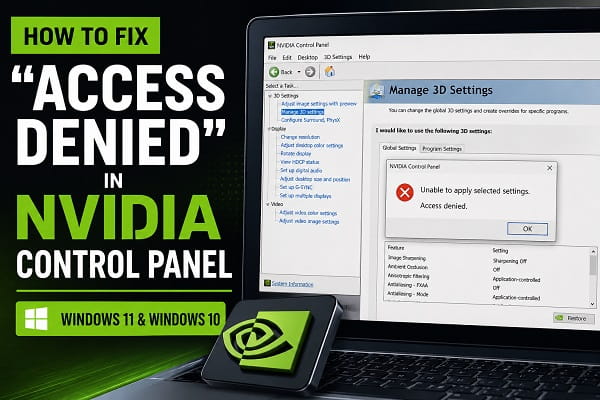
The NVIDIA Control Panel allows you to customize graphics settings, adjust display configurations, optimize gaming performance, and manage your GPU. However, some users encounter an “Access Denied” error when trying to apply changes, preventing them from saving settings or configuring their graphics card.
The error often appears after updating Windows, installing a new NVIDIA driver, changing user account permissions, or performing a clean installation of the graphics driver. In some cases, the message may say “Unable to apply selected settings” followed by “Access Denied.”
Fortunately, this problem is usually caused by software conflicts or permission issues rather than faulty hardware.
This guide explains the most common causes of the NVIDIA Control Panel Access Denied error and provides step-by-step solutions to help you fix it on Windows 11 and Windows 10.
Why Does the NVIDIA Control Panel Show “Access Denied”?
Several factors can trigger this error, including:
- Corrupted NVIDIA drivers.
- Insufficient administrator permissions.
- Windows security restrictions.
- Damaged NVIDIA services.
- Corrupted user profile.
- Windows updates.
- Conflicting third-party software.
- Incorrect folder permissions.
- Missing NVIDIA components.
Understanding the cause helps you choose the right solution.
Before You Begin
Before trying advanced fixes:
- Restart your computer.
- Close the NVIDIA Control Panel completely.
- Make sure Windows is fully updated.
- Disconnect unnecessary external devices.
- Create a System Restore Point if possible.
Sometimes a simple restart resolves temporary permission issues.
Fix 1: Run NVIDIA Control Panel as Administrator
Permission problems are one of the most common causes of this error.
To run the application with elevated privileges:
- Press Start.
- Search for NVIDIA Control Panel.
- Right-click it.
- Select Run as administrator.
- Try applying your settings again.
If the changes save successfully, Windows permission restrictions were likely causing the problem.
Fix 2: Restart NVIDIA Services
Windows relies on several NVIDIA services to communicate with your graphics driver.
To restart them:
- Press Windows + R.
- Type services.msc.
- Press Enter.
- Locate services such as:
- NVIDIA Display Container LS
- NVIDIA LocalSystem Container
- NVIDIA NetworkService Container (if available)
- Right-click each service.
- Choose Restart.
If a service isn’t running, select Start instead.
Restart your computer afterward and check whether the error has disappeared.
Fix 3: Restart Windows Explorer
Sometimes the issue is related to Windows Explorer rather than the graphics driver.
To restart Explorer:
- Press Ctrl + Shift + Esc.
- Open Task Manager.
- Locate Windows Explorer.
- Right-click it.
- Select Restart.
Once Explorer reloads, open NVIDIA Control Panel again.
Fix 4: Perform a Clean Installation of NVIDIA Drivers
A corrupted graphics driver is one of the leading causes of the Access Denied error.
To reinstall it:
- Visit NVIDIA’s official driver download page.
- Download the latest driver for your graphics card.
- Run the installer.
- Choose Custom Installation.
- Enable Perform a clean installation.
- Complete the installation.
- Restart your PC.
A clean installation removes old driver settings that may be causing conflicts.
If Windows continues to experience driver-related problems after reinstalling NVIDIA software, How to Disable Driver Signature Enforcement in Windows 11 explains how to temporarily install trusted drivers that Windows may otherwise block.
Fix 5: Update Windows
Windows updates often include compatibility improvements for graphics drivers.
To check for updates:
- Press Windows + I.
- Open Windows Update.
- Click Check for updates.
- Install any available updates.
- Restart your computer.
Keeping Windows updated helps eliminate compatibility issues between Windows and NVIDIA drivers.
Fix 6: Check Folder Permissions
Sometimes Windows blocks NVIDIA from saving configuration files because of incorrect folder permissions.
To verify permissions:
- Open File Explorer.
- Navigate to the NVIDIA configuration folder if applicable.
- Right-click the folder.
- Select Properties.
- Open the Security tab.
- Ensure your user account has Full Control.
- Apply the changes.
Be careful when changing permissions on system folders.
Fix 7: Disable Antivirus Temporarily
Some antivirus programs prevent NVIDIA Control Panel from modifying configuration files.
Temporarily disable your antivirus and test whether the settings save correctly.
If the error disappears, add NVIDIA Control Panel to your antivirus exclusions before re-enabling protection.
Fix 8: Reinstall NVIDIA Control Panel
If the application itself is corrupted, reinstalling it can resolve the problem.
You can reinstall NVIDIA Control Panel through the Microsoft Store or by reinstalling the complete NVIDIA graphics driver package.
Restart your computer after installation.
Fix 9: Create a New Windows User Account
Corrupted user profiles sometimes prevent applications from saving settings.
To test this:
- Open Settings.
- Go to Accounts.
- Select Other users.
- Create a new local account.
- Sign into the new account.
- Open NVIDIA Control Panel.
If the error no longer appears, your original user profile may be corrupted.
Fix 10: Use System File Checker
Damaged Windows system files can interfere with NVIDIA services.
Run the following command in Command Prompt (Administrator):
sfc /scannowWait for Windows to complete the scan and repair any corrupted files.
If Windows reports corrupted files that it can’t repair, continue with the DISM repair tool described in the next section.
Fix 11: Repair Windows System Image Using DISM
If the System File Checker (SFC) doesn’t resolve the issue, use the Deployment Image Servicing and Management (DISM) tool to repair the Windows system image.
Follow these steps:
- Open Command Prompt as Administrator.
- Run the following command:
DISM /Online /Cleanup-Image /RestoreHealth- Wait for the scan to finish.
- Restart your computer.
Once Windows restarts, open NVIDIA Control Panel and check whether you can apply settings without receiving the Access Denied error.
Fix 12: Perform a Clean Boot
Third-party applications sometimes interfere with NVIDIA services.
A Clean Boot starts Windows with only essential Microsoft services.
Here’s how:
- Press Windows + R.
- Type msconfig.
- Press Enter.
- Open the Services tab.
- Check Hide all Microsoft services.
- Click Disable all.
- Open the Startup tab.
- Click Open Task Manager.
- Disable unnecessary startup applications.
- Restart your PC.
If NVIDIA Control Panel works normally afterward, re-enable services one at a time until you identify the conflicting application.
Fix 13: Install the Latest Graphics Driver from NVIDIA
Although Windows Update installs graphics drivers automatically, they aren’t always the latest version.
Download the newest driver directly from NVIDIA’s official website.
During installation:
- Select Custom Installation.
- Check Perform a clean installation.
- Restart your computer after the installation finishes.
Installing the latest certified driver often resolves permission-related issues introduced by outdated software.
Fix 14: Use System Restore
If the error started recently after a Windows update, driver installation, or software change, restoring Windows to an earlier restore point may solve the problem.
To restore your system:
- Search for Create a restore point.
- Open System Protection.
- Click System Restore.
- Choose a restore point created before the issue appeared.
- Follow the on-screen instructions.
Your personal files won’t be affected, but recently installed drivers or applications may be removed.
Common Causes of the NVIDIA Control Panel Access Denied Error
If none of the above methods work, the problem is usually caused by one of the following:
- Corrupted NVIDIA driver installation.
- Damaged Windows system files.
- Incorrect folder permissions.
- Antivirus software blocking NVIDIA.
- Corrupted Windows user profile.
- Windows Update compatibility issues.
- Third-party optimization software.
- Incomplete graphics driver updates.
Identifying the underlying cause makes it much easier to prevent the error from returning.
How to Prevent the Error from Happening Again
To reduce the chances of encountering this issue in the future:
- Keep Windows updated.
- Install graphics drivers only from trusted sources.
- Avoid force-closing NVIDIA services.
- Create restore points before major driver updates.
- Perform clean installations when changing graphics drivers.
- Keep your antivirus software up to date.
- Restart your PC after installing graphics drivers.
These practices help maintain a stable graphics environment and minimize driver conflicts.
If you’ve recently updated Windows and started experiencing other system issues, How to Boot Windows 11 in Safe Mode (6 Easy Methods) explains how to enter Safe Mode for advanced troubleshooting without loading unnecessary drivers or startup programs.
Frequently Asked Questions
Why does NVIDIA Control Panel say “Access Denied”?
This usually happens because Windows doesn’t have permission to save NVIDIA settings, the graphics driver is corrupted, or a Windows service required by NVIDIA isn’t running properly.
What does “Unable to apply selected settings” mean?
It means NVIDIA Control Panel couldn’t save the configuration changes you made. Permission issues, corrupted drivers, or Windows security settings are the most common causes.
Will reinstalling the NVIDIA driver fix the problem?
In many cases, yes. Performing a clean installation removes damaged driver files and replaces them with fresh copies, which often resolves the Access Denied error.
Can antivirus software cause this issue?
Yes. Some antivirus or security programs may prevent NVIDIA Control Panel from writing configuration files. Temporarily disabling your antivirus can help determine whether it’s the source of the problem.
Is this a hardware problem?
Usually not. The Access Denied error is almost always caused by software, Windows permissions, or graphics driver issues rather than a faulty graphics card.
Should I reset my PC?
Resetting Windows should be considered a last resort. Most users can resolve the problem by restarting NVIDIA services, repairing system files, reinstalling the graphics driver, or correcting folder permissions.
If none of these solutions work, How to Reinstall Windows 11 (Step-by-Step Guide) explains how to reinstall Windows while preserving your personal files whenever possible.
If you’re still seeing the “Access Denied” error in NVIDIA Control Panel after trying these fixes, the problem is most likely related to a damaged driver installation or Windows permissions. Working through the solutions in order from the simplest fixes like restarting services to more advanced options like repairing system files or performing a clean driver installation will resolve the issue in most cases. Once everything is working correctly, keep your NVIDIA drivers and Windows installation up to date to reduce the chances of the error returning.
