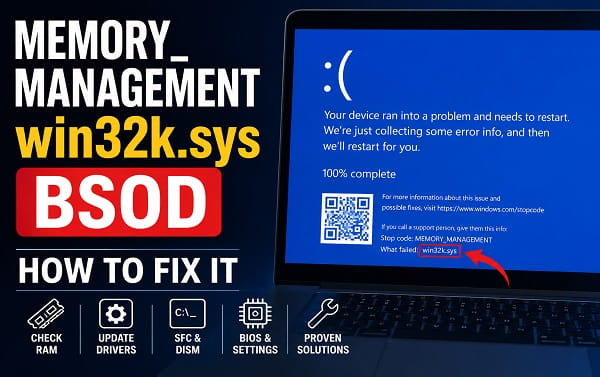
The MEMORY_MANAGEMENT BSOD is a Windows blue screen that appears when the operating system detects a serious problem while managing memory. It may show only the MEMORY_MANAGEMENT stop code, or it may also name a Windows component such as win32k.sys.
The MEMORY_MANAGEMENT stop code has the bug check value 0x0000001A. Microsoft describes it as a severe memory-management error. The underlying cause can involve faulty or unstable RAM, a driver writing bad data into memory, unstable BIOS memory settings, damaged Windows system files, storage problems, or another low-level hardware or software issue.
If your blue screen specifically says MEMORY_MANAGEMENT win32k.sys, do not assume win32k.sys itself is damaged. In many cases, that file is simply the Windows component that happened to be active when corrupted memory was detected.
Whether you searched for memory management BSOD, memory management blue screen, or windows stop code memory management win32k.sys, the troubleshooting process is largely the same. Start by undoing recent hardware or driver changes, test the system memory, return overclocked memory settings to defaults, update or roll back problematic drivers, and repair Windows system files. If the crashes continue, the crash dump can help identify whether the problem is more likely to be RAM, a driver, or another component.
What Is the MEMORY_MANAGEMENT BSOD?
The MEMORY_MANAGEMENT blue screen means Windows detected a serious error while managing memory.
Microsoft assigns this bug check the code:
0x0000001AThe parameters that appear with the bug check can describe different types of memory corruption or page-table problems. That is why two PCs showing the same MEMORY_MANAGEMENT BSOD can have completely different root causes.
The stop code can appear on Windows 11 during gaming, startup, ordinary desktop use, video playback, sleep or wake, or seemingly at random. The key is to diagnose what corrupted memory rather than treating the blue screen text as the root cause by itself.
What If the MEMORY_MANAGEMENT BSOD Names win32k.sys?
If the blue screen also names:
win32k.sysit does not automatically mean the file is damaged.
Microsoft describes win32k.sys as a kernel-mode component of the Windows subsystem. It is involved with the Windows window manager, graphics output, input handling, and related graphical operations.
Because it operates at a very low level in Windows, corruption caused elsewhere can become visible while win32k.sys is executing.
Think of it this way: if Windows detects corrupted memory while win32k.sys is trying to use that memory, the crash may mention win32k.sys even though unstable RAM or another driver damaged the data earlier.
This is why replacing win32k.sys should not be your first troubleshooting step.
Common Causes of the MEMORY_MANAGEMENT BSOD
The most likely causes include:
- Faulty RAM
- Unstable RAM timings or voltage
- XMP or EXPO memory profiles that are not fully stable
- CPU or memory overclocking
- A recently installed or updated device driver
- Graphics driver problems
- Corrupted Windows system files
- Storage errors affecting system data or the page file
- BIOS or UEFI compatibility problems
- Recently installed hardware
- Conflicts caused by low-level utilities
- Severe overheating or hardware instability
The error can occur during gaming, normal desktop use, startup, video playback, sleep or wake, or seemingly at random.
The pattern of the crashes can provide clues.
For example, crashes that begin immediately after installing new RAM deserve a different first response from crashes that began immediately after a GPU driver update.
Quick Fix Order for a MEMORY_MANAGEMENT BSOD
If you want the shortest sensible troubleshooting order, use this sequence:
- Restart Windows and undo any very recent hardware or driver change.
- Install current Windows updates.
- Run Windows Memory Diagnostic.
- Disable XMP, EXPO, and manual overclocks temporarily.
- Update or roll back graphics, chipset, and other low-level drivers.
- Run DISM and
sfc /scannow. - Check the system drive for errors.
- Test RAM modules individually if memory errors or repeated crashes continue.
- Review minidumps with WinDbg if software and basic hardware checks do not reveal the cause.
If your BSOD specifically names win32k.sys, use the same order. The file name alone does not prove that win32k.sys needs to be replaced.
Before You Start Troubleshooting
Save important files if Windows still stays running long enough to do so.
Repeated memory-related blue screens can eventually interrupt writes to open files or make Windows harder to start, especially if the underlying problem is hardware instability.
Then note what changed shortly before the first crash.
Ask yourself:
- Did I install new RAM?
- Did I enable XMP or EXPO?
- Did I change BIOS settings?
- Did I install a new GPU?
- Did Windows install a driver update?
- Did I update NVIDIA, AMD, or Intel graphics drivers?
- Did I update the BIOS?
- Did I install motherboard or chipset software?
- Did I start using an overclock or undervolt?
- Did the crashes begin after a Windows update?
A recent change is not always responsible, but it gives you a sensible starting point.
1. Restart the PC and Remove Recent Hardware Changes
If the blue screen appeared only once, restart Windows and use the PC normally for a while.
One isolated crash does not automatically prove that the RAM has failed.
If the error keeps returning and you recently added hardware, temporarily undo that change where practical.
Examples include:
- Newly installed RAM
- A second RAM kit
- A new GPU
- A PCIe expansion card
- A new USB device
- A new storage drive
- A docking station
- An external adapter
Microsoft recommends removing recently added hardware as one of the basic steps for recurring Windows stop-code errors.
If you installed new RAM, pay particular attention to it. Memory modules that are incompatible, incorrectly seated, defective, or unstable at their configured speed can produce MEMORY_MANAGEMENT crashes.
Power the PC down completely before opening the case.
If you are not comfortable handling internal computer components, use the software checks first or have the hardware inspected by a technician.
2. Install Windows Updates
Before making advanced changes, make sure Windows is current.
Open:
Settings > Windows Update
Click:
Check for updates
Install available quality and security updates, then restart.
Windows updates can include fixes for the operating system and hardware compatibility.
Also check:
Settings > Windows Update > Advanced options > Optional updates
If Windows offers a relevant hardware driver, review it carefully.
Microsoft notes that Windows 11 installs recommended drivers automatically while optional driver updates can be installed manually.
Do not install every optional driver simply because it appears. If your PC manufacturer provides a newer chipset, graphics, storage, or system driver specifically for your model, that may be the better source.
3. Run Windows Memory Diagnostic
Because the stop code directly involves memory management, testing RAM is one of the most important steps.
Windows includes a built-in memory-testing utility.
Press:
Windows + RType:
mdsched.exeand press Enter.
Choose:
Restart now and check for problems
Save your work first because the computer will restart.
Windows Memory Diagnostic will test the system memory before Windows loads normally.
After the test finishes, the PC should restart into Windows.
If the diagnostic reports memory errors, treat that result seriously. A memory error can indicate:
- A defective RAM module
- An unstable memory profile
- A bad memory slot
- Incorrect timings or voltage
- A memory-controller stability issue
- Incompatible RAM modules
Do not assume that buying new RAM is immediately necessary. First return memory settings to defaults and test the modules systematically.
4. Turn Off XMP, EXPO, and Memory Overclocking
If XMP, EXPO, DOCP, or another memory-performance profile is enabled, temporarily disable it.
These profiles are designed to run memory at its rated performance settings rather than conservative default settings. A configuration can appear stable for normal tasks but still fail under certain loads.
Enter your BIOS or UEFI and load the normal memory defaults.
Depending on your motherboard, the setting may be called:
- XMP
- Extreme Memory Profile
- EXPO
- DOCP
- A-XMP
- Memory Profile
- DRAM Profile
Set the profile to Disabled, Auto, or the motherboard’s default configuration.
Then save the changes and test Windows again.
If you are not sure how to enter the firmware interface, my How to Open BIOS in Windows 11 article explains the available methods.
If the blue screens stop with XMP or EXPO disabled, the problem is likely related to memory stability rather than a damaged win32k.sys file.
You can then investigate whether the RAM kit is on the motherboard’s compatibility list, whether the BIOS needs updating, or whether a lower memory speed is necessary.
5. Remove CPU, GPU, and RAM Overclocks Temporarily
Memory corruption can also result from instability outside the RAM modules themselves.
Return any manual overclock or undervolt to default while troubleshooting.
This includes changes to:
- CPU frequency
- CPU voltage
- RAM frequency
- RAM voltage
- Memory timings
- Infinity Fabric or memory-controller settings
- GPU core frequency
- GPU memory frequency
- GPU voltage
The goal is not to prove that overclocking is always bad. The goal is to establish a known-stable baseline.
If the PC stops crashing at stock settings, restore performance tuning one change at a time until you identify the unstable configuration.
Do not troubleshoot a MEMORY_MANAGEMENT crash while several components are simultaneously running outside their default specifications.
6. Test RAM Modules Individually
If Windows Memory Diagnostic reports errors, or the crashes strongly point to RAM, test the modules separately.
Turn the PC off and disconnect power.
If you have two RAM sticks:
- Remove one module.
- Leave the other module installed in the motherboard-recommended single-stick slot.
- Boot Windows and test the PC.
- Run the memory test again.
- Swap the modules.
- Repeat the test.
If one stick consistently produces errors and the other does not, the suspect module may be defective.
If both sticks work individually but the PC becomes unstable when both are installed, investigate:
- Memory frequency
- XMP or EXPO
- Motherboard compatibility
- BIOS version
- Slot configuration
- Memory-controller stability
- Mixed RAM kits
Do not mix different memory kits merely because they have the same advertised speed and capacity. Kits can use different chips, subtimings, or voltage requirements.
Also make sure the modules are installed in the motherboard’s recommended slots. On many four-slot motherboards, a two-stick kit belongs in the second and fourth slots from the CPU, but you should follow the motherboard manual rather than assuming the layout.
7. Reseat the RAM
A poorly seated memory module can create instability.
Shut the computer down completely.
For a desktop:
- Turn off the PSU if it has a switch.
- Disconnect the power cable.
- Press the power button briefly to discharge residual power.
- Open the case.
- Release the RAM retaining clips.
- Remove the modules carefully.
- Check the slots for obvious dust or debris.
- Reinstall each module firmly until it is fully seated and latched.
- Reconnect power and start the PC.
Avoid touching the memory contacts.
On a laptop, RAM may be soldered or difficult to access. Do not open the device if doing so risks damage or violates service requirements.
8. Update or Reinstall the Graphics Driver
Because win32k.sys participates in the Windows graphical subsystem, graphics-driver problems deserve attention, especially when the crash occurs while gaming, playing video, changing displays, waking from sleep, or using GPU-accelerated applications.
Start by obtaining the appropriate driver from:
- NVIDIA
- AMD
- Intel
- Your laptop manufacturer
- Your PC manufacturer’s support page
If the crashes started immediately after a graphics-driver update, rolling back can be more useful than installing the same new version again.
For NVIDIA systems, see How to Roll Back NVIDIA Driver on Windows 11.
You can also use Device Manager:
- Right-click Start.
- Select Device Manager.
- Expand Display adapters.
- Right-click your GPU.
- Select Properties.
- Open the Driver tab.
- Choose Roll Back Driver if the option is available.
If rolling back solves the crashes, pause before reinstalling the problematic driver version.
If the driver may be corrupted rather than simply incompatible, reinstall the graphics driver using the manufacturer’s official package.
9. Update Chipset and Other Important Drivers
Do not focus only on the GPU.
Memory corruption can involve low-level drivers for other hardware.
Check the support page for your motherboard, desktop PC, or laptop and review current drivers for:
- Chipset
- Storage controller
- Intel Management Engine or AMD platform components
- Network adapter
- Audio
- Thunderbolt or USB controllers
- GPU
Use drivers intended for your exact hardware and Windows version.
Avoid third-party “driver updater” programs that claim to update every driver automatically. They can install inappropriate or outdated packages and add another variable to an already unstable PC.
10. Run DISM and System File Checker
If RAM testing does not immediately reveal a hardware problem, repair the Windows component store and protected system files.
Open Command Prompt, Windows Terminal, or PowerShell as administrator.
Run:
DISM.exe /Online /Cleanup-Image /RestoreHealthWait for DISM to complete.
Then run:
sfc /scannowMicrosoft recommends running DISM before System File Checker when repairing corrupted Windows components.
Restart the PC after both commands finish.
If SFC reports:
Windows Resource Protection could not perform the requested operationdo not keep running the command repeatedly. Use my Windows Resource Protection Error: How to Fix It article to troubleshoot that specific failure.
SFC may repair Windows files involved in the crash, but remember that repeated system-file corruption can itself be a symptom of unstable RAM or storage.
If corrupted files return shortly after being repaired, continue investigating the underlying hardware.
11. Check the System Drive for File-System Errors
Windows relies on storage for the operating system, applications, and the page file.
A failing or corrupted drive can contribute to crashes that look like memory problems.
Open an administrator Command Prompt and run:
chkdsk C: /scanThis performs an online scan of the C: drive.
If Windows finds problems that require an offline repair, follow the instructions it provides.
You can also check your drive manufacturer’s diagnostic tools when you suspect SSD or HDD failure.
Warning signs include:
- File corruption
- Very slow reads or writes
- Windows freezing during disk access
- SMART warnings
- Applications repeatedly becoming corrupted
- Problems installing updates
- Frequent disk-related Event Viewer errors
Do not assume CHKDSK can repair physically failing storage. If the drive is showing hardware-failure symptoms, back up important data as soon as possible.
12. Leave the Windows Page File on Automatic Management
The page file is part of Windows virtual memory.
If you manually disabled it or configured an unusual fixed size before the crashes started, return it to automatic management.
Press:
Windows + RType:
sysdm.cplPress Enter.
Then go to:
Advanced > Performance > Settings > Advanced > Virtual memory > Change
Enable:
Automatically manage paging file size for all drives
Click OK and restart Windows.
A page file is not a substitute for physical RAM, and increasing it will not repair defective memory. The purpose of this step is to remove a custom virtual-memory configuration as a troubleshooting variable.
13. Boot Windows in Safe Mode
Safe Mode loads Windows with a reduced set of drivers and services.
If the MEMORY_MANAGEMENT win32k.sys crash disappears completely in Safe Mode, that increases the possibility that a third-party driver, startup program, or service contributes to the problem.
To reach Startup Settings:
- Hold Shift while selecting Restart.
- Choose Troubleshoot.
- Select Advanced options.
- Select Startup Settings.
- Click Restart.
- Choose Safe Mode or Safe Mode with Networking.
For more methods, use How to Boot Windows 11 in Safe Mode.
Use the PC in Safe Mode long enough to determine whether the blue screen still occurs.
Safe Mode is not a permanent fix. It is a diagnostic environment.
If the PC still crashes with MEMORY_MANAGEMENT in Safe Mode, hardware instability becomes more suspicious, although it is not automatically proven.
14. Perform a Clean Boot
If Safe Mode is stable, use a clean boot to narrow down third-party software conflicts.
A clean boot starts Windows with Microsoft services and a reduced set of startup programs.
Press:
Windows + RType:
msconfigand press Enter.
Then:
- Open the Services tab.
- Check Hide all Microsoft services.
- Click Disable all.
- Open the Startup tab.
- Open Task Manager.
- Disable nonessential startup applications.
- Restart the PC.
Microsoft recommends keeping track of what you disable so you can restore the normal configuration afterward.
If the blue screens stop, enable services and startup programs in groups until the problem returns.
Pay special attention to software that installs low-level drivers, such as:
- RGB and motherboard utilities
- Hardware-monitoring tools
- Overclocking utilities
- Fan-control software
- Antivirus or endpoint security products
- Virtualization software
- Peripheral-control suites
- Screen-capture or overlay tools
Do not permanently disable Microsoft services while testing.
15. Check Whether the Crash Started After a Driver Update
Timing matters.
If the computer was stable for months and began crashing immediately after one particular driver update, investigate that update first.
You can check driver versions in Device Manager.
For a device:
- Open Device Manager.
- Expand the relevant category.
- Right-click the device.
- Select Properties.
- Open Driver.
- Note the driver provider, date, and version.
If Roll Back Driver is available and the crashes started after that update, use it.
Do not assume the newest driver is always the most stable for every hardware combination.
Laptop manufacturers in particular may customize graphics, chipset, audio, power-management, and other drivers for specific models.
16. Check the BIOS or UEFI Version
BIOS updates can contain memory-compatibility, CPU microcode, stability, and hardware fixes.
First check which version you currently have.
My How to Check BIOS Version on Windows 11 article shows several ways to find it.
Then compare your version with the firmware offered by the PC or motherboard manufacturer.
Read the release notes.
A BIOS update becomes especially relevant if:
- You recently upgraded the CPU
- You installed new RAM
- The motherboard vendor lists memory-stability fixes
- The system is using an early firmware release
- The PC has known compatibility updates
- Crashes continue after returning BIOS settings to defaults
BIOS updates should not be performed casually on an unstable system.
Follow the manufacturer’s instructions exactly and make sure power will not be interrupted.
If the system is crashing unpredictably even outside Windows, solve obvious hardware-instability issues before attempting a firmware update where possible.
17. Load BIOS Defaults
If you have changed several firmware options and no longer remember the original values, loading optimized defaults can remove a bad configuration.
The option may be called:
- Load Optimized Defaults
- Load Setup Defaults
- Restore Defaults
- Load UEFI Defaults
After loading defaults, save and restart.
Be aware that changing firmware settings can affect:
- Boot mode
- Storage-controller mode
- Secure Boot
- Virtualization
- Fan profiles
- Memory profiles
- Resizable BAR
- Other hardware settings
If this is a work PC or a machine using BitLocker, make sure you understand the effect of firmware changes and have your recovery information available before making major changes.
18. Check Temperatures and General Hardware Stability
MEMORY_MANAGEMENT does not specifically mean overheating, but a severely unstable system can corrupt data when hardware is operating outside safe limits.
Check CPU and system temperatures under load.
My How to Check CPU Temperature on Windows 11 article explains several safe methods.
Look for:
- CPU temperature rising abnormally fast
- Fans not spinning correctly
- Dust-blocked heatsinks
- A poorly mounted CPU cooler
- GPU overheating
- Power instability
- Crashes only during heavy gaming or rendering
If the system crashes only under heavy load, do not test memory in isolation. CPU, motherboard, GPU, PSU, and cooling stability can all matter.
19. Check Windows Minidump Files
If the blue screen continues, the crash dump may provide better evidence than the stop screen alone.
Windows commonly stores small crash dumps in:
C:\Windows\MinidumpNot every system will have a file there. Dump creation depends on the Windows crash-dump configuration and whether Windows successfully writes the dump before restarting.
Microsoft provides WinDbg for crash-dump analysis.
After opening a dump in WinDbg, one of the standard commands is:
!analyze -vThis produces a detailed analysis.
Look for information such as:
- BugCheck code
- BugCheck parameters
- MODULE_NAME
- IMAGE_NAME
- PROCESS_NAME
- FAILURE_BUCKET_ID
- Stack information
Do not automatically treat the first .sys filename you see as the guilty driver.
A corrupted memory structure can cause Windows to crash in an innocent component that merely touched the corrupted memory.
Repeated dumps that consistently point toward the same third-party driver are more useful than one dump naming a core Windows component such as ntoskrnl.exe or win32k.sys.
20. What If WinDbg Says win32k.sys Caused the Crash?
Treat that result as a clue, not a final diagnosis.
win32k.sys is a core Windows kernel-mode component involved with windowing, graphics, and input.
If every dump names win32k.sys, investigate the components that interact heavily with the graphical and kernel environment, including:
- GPU drivers
- Display utilities
- Overlay software
- Remote-desktop tools
- Input-device software
- Security software
- Corrupted Windows files
- Unstable RAM
Also examine the exact MEMORY_MANAGEMENT bug-check parameters rather than stopping at the module name.
Microsoft’s 0x1A documentation lists multiple parameter values, each representing a different type of memory-management failure.
For advanced diagnosis, the parameters and stack are much more informative than simply seeing win32k.sys on the blue screen.
21. What If the PC Cannot Stay Booted Long Enough to Fix It?
Use Windows Recovery Environment.
You can enter WinRE by holding Shift while selecting Restart when Windows is accessible.
If Windows repeatedly fails to start, it may enter recovery automatically.
From WinRE, useful options can include:
Troubleshoot > Advanced options > Startup Settings
for Safe Mode, and:
Troubleshoot > Advanced options > Startup Repair
for startup-related problems.
If the crashes began after a recent update or system change, other recovery options may also be available.
Do not reset or reinstall Windows before checking RAM if memory errors are already being reported. Installing Windows onto a machine with unstable hardware can result in another corrupted installation.
22. Should You Reinstall Windows?
A clean Windows installation is not my first recommendation for a MEMORY_MANAGEMENT error.
Reinstalling Windows can help if:
- Windows system files are badly damaged
- The installation has accumulated serious software conflicts
- Driver cleanup has failed
- Hardware tests are clean
- The crashes started after major system modifications
However, reinstalling Windows will not repair defective RAM, an unstable memory controller, a failing SSD, a bad motherboard, or an unstable overclock.
If the PC shows memory errors outside normal Windows operation, solve the hardware problem first.
23. When Faulty RAM Becomes the Most Likely Cause
RAM becomes increasingly suspicious when several of these are true:
- Windows Memory Diagnostic reports errors
- Crashes occur with different stop codes
- Applications randomly crash
- Files become corrupted
- Windows installation fails unexpectedly
- Blue screens continue in Safe Mode
- The problem started after installing new RAM
- One RAM stick fails while another is stable
- Disabling XMP or EXPO fixes the problem
- The PC crashes during memory-intensive workloads
- Different Windows installations show the same problem
At that point, software repair commands are unlikely to solve the root cause.
Test the modules individually and follow the RAM or PC manufacturer’s warranty process if a module proves defective.
24. When a Driver Becomes More Likely
A driver becomes more suspicious when:
- The crashes began immediately after a driver update
- Safe Mode is stable
- Rolling back the driver stops the crashes
- Several dumps repeatedly identify the same third-party
.sysfile - The crash occurs only when using one hardware device
- The problem appears only during gaming, video playback, or GPU acceleration
- Removing a recently installed utility solves the problem
Use the hardware manufacturer’s driver package rather than downloading individual .sys files from third-party sites.
25. Do Not Download win32k.sys From a DLL or Driver Website
A common search result for system-file errors is a website offering individual Windows files for download.
Do not fix this blue screen by replacing win32k.sys manually with an unknown copy.
There are several problems with that approach:
- The file may not match your Windows build.
- The download may be modified or malicious.
- Windows protects core system components for a reason.
- The crash may have nothing to do with file corruption.
- Replacing the visible crash module does not fix faulty RAM or a bad driver.
If Windows system files are damaged, use DISM and SFC or an official Windows repair method.
Frequently Asked Questions
What is a MEMORY_MANAGEMENT BSOD?
A MEMORY_MANAGEMENT BSOD is Windows bug check 0x0000001A. It means Windows detected a severe error while managing memory. Possible causes include faulty or unstable RAM, bad drivers, unstable memory settings, corrupted system files, storage problems, and other low-level instability.
How do I fix a memory management BSOD in Windows 11?
Start with Windows updates and Windows Memory Diagnostic. Then disable XMP, EXPO, and overclocking temporarily, update or roll back drivers, run DISM and SFC, check the system drive, and test RAM modules individually if the crashes continue.
What does MEMORY_MANAGEMENT win32k.sys mean?
It means Windows triggered the MEMORY_MANAGEMENT bug check while win32k.sys was involved in the failing operation. The file itself is not necessarily the root cause. Unstable RAM, drivers, graphics-related software, or other memory corruption can cause Windows to crash while win32k.sys is active.
Is win32k.sys a virus?
The legitimate win32k.sys file is a Windows system component. A blue screen naming it does not mean your PC has malware.
Do not download a replacement copy from an unofficial website.
Does MEMORY_MANAGEMENT always mean bad RAM?
No.
Faulty or unstable RAM is an important possibility, but drivers, BIOS memory settings, system-file corruption, storage problems, and other hardware instability can also cause memory-management crashes.
Can XMP cause MEMORY_MANAGEMENT?
An unstable memory profile can contribute to memory errors. Temporarily disabling XMP, EXPO, DOCP, or another memory profile is a useful diagnostic step.
If Windows becomes stable at default memory settings, investigate RAM compatibility, BIOS updates, memory voltage, timings, and speed before turning the profile back on.
How do I test RAM in Windows 11?
Press Windows + R, type:
mdsched.exeand press Enter.
Choose Restart now and check for problems to run Windows Memory Diagnostic.
Why does the MEMORY_MANAGEMENT error happen while gaming?
Gaming increases load on RAM, the GPU, CPU, drivers, storage, and the power supply.
If the crash appears mainly during games, investigate memory stability, GPU drivers, overclocking, temperatures, and hardware stability under load.
Should I replace win32k.sys?
No.
Use official Windows repair tools such as DISM and System File Checker if you suspect system-file corruption. Manually replacing a core Windows file is not the correct first response to this stop code.
Can a graphics driver cause a win32k.sys BSOD?
A graphics or other kernel-mode driver can contribute to memory corruption that later causes a crash while the Windows graphical subsystem is active.
If the problem began after a GPU driver update, update, reinstall, or roll back that driver and test again.
Can an SSD cause MEMORY_MANAGEMENT?
Storage problems can contribute to system instability, corrupted files, or page-file problems, although the MEMORY_MANAGEMENT stop code alone does not prove that the SSD is defective.
Check both memory and storage when other symptoms point to disk problems.
What if Windows Memory Diagnostic finds no errors?
Continue with the other troubleshooting steps.
A clean result reduces the evidence for an obvious RAM fault but does not prove that every memory configuration is stable under every workload.
Test without XMP or overclocking, review drivers, repair Windows files, and examine crash dumps if the problem continues.
What if the error started after installing new RAM?
Disable XMP or EXPO, verify that the modules are in the correct slots, reseat them, and test the sticks individually.
Also check the motherboard’s supported-memory information and BIOS updates.
Can updating the BIOS fix MEMORY_MANAGEMENT?
A BIOS update can help when the manufacturer has released memory-compatibility or system-stability improvements.
Check your current BIOS version and read the manufacturer’s release notes before updating.
Should I use Driver Verifier?
Driver Verifier is an advanced Windows diagnostic tool intended to stress drivers and can deliberately trigger crashes when it detects driver problems.
For a normal home troubleshooting workflow, I would analyze existing crash dumps, update or roll back suspicious drivers, use Safe Mode, and test hardware before using Driver Verifier.
If you use advanced driver-debugging tools, make sure you understand how to recover the PC if Windows becomes difficult to boot.
Fix the Cause of the MEMORY_MANAGEMENT BSOD, Not Just the File Named
When Windows shows a MEMORY_MANAGEMENT BSOD, focus on what can corrupt memory rather than treating the visible stop-screen text as the diagnosis. If win32k.sys is also named, that still does not mean the file itself is the underlying problem.
Start with Windows updates and a memory test. Return XMP, EXPO, overclocks, and undervolts to default settings. If you recently changed drivers, especially graphics or chipset drivers, update or roll them back. Then repair Windows with DISM and SFC and test in Safe Mode if the crashes continue.
If memory errors appear, test the RAM modules individually. If the hardware checks pass but the BSOD continues, inspect several minidumps with WinDbg and look for a repeated third-party driver or consistent bug-check pattern.
That sequence gives you a much better chance of finding the real cause than downloading a replacement win32k.sys file or reinstalling Windows before checking the hardware.
